-
- How to Secure Your VPS Against Cyber Threats and Attacks
- Understanding the Risks
- Configuration Steps to Secure Your VPS
- 1. Update Your System Regularly
- 2. Configure a Firewall
- 3. Disable Root Login
- 4. Use SSH Key Authentication
- 5. Install Fail2Ban
- Best Practices for VPS Security
- Real-World Examples
- Case Studies and Statistics
How to Secure Your VPS Against Cyber Threats and Attacks
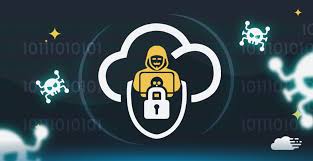
In today’s digital landscape, securing your Virtual Private Server (VPS) is more critical than ever. With the increasing number of cyber threats and attacks, ensuring the integrity, confidentiality, and availability of your server is paramount. A compromised VPS can lead to data breaches, service disruptions, and significant financial losses. This guide will provide you with actionable steps, best practices, and real-world examples to effectively secure your VPS against potential threats.
Understanding the Risks
Before diving into security measures, it’s essential to understand the risks associated with VPS hosting. Common threats include:
- Unauthorized access
- Malware infections
- DDoS attacks
- Data breaches
- Misconfigurations
According to a report by Cybersecurity Ventures, global cybercrime damages are expected to reach $10.5 trillion annually by 2025, highlighting the urgency of implementing robust security measures.
Configuration Steps to Secure Your VPS
1. Update Your System Regularly
Keeping your operating system and software up to date is crucial for security. Regular updates patch vulnerabilities that could be exploited by attackers.
sudo apt update && sudo apt upgrade -y2. Configure a Firewall
A firewall acts as a barrier between your VPS and potential threats. Use tools like UFW (Uncomplicated Firewall) to manage your firewall settings.
sudo ufw allow OpenSSH
sudo ufw enable
sudo ufw status
3. Disable Root Login
Disabling root login adds an extra layer of security. Instead, create a new user with sudo privileges.
adduser newuser
usermod -aG sudo newuser
sudo nano /etc/ssh/sshd_config
# Change 'PermitRootLogin yes' to 'PermitRootLogin no'
sudo systemctl restart sshd
4. Use SSH Key Authentication
SSH key authentication is more secure than password-based logins. Generate an SSH key pair and add the public key to your VPS.
ssh-keygen -t rsa -b 4096
ssh-copy-id newuser@your_vps_ip
5. Install Fail2Ban
Fail2Ban helps protect your server from brute-force attacks by monitoring log files and banning IP addresses that show malicious signs.
sudo apt install fail2ban
sudo systemctl enable fail2ban
sudo systemctl start fail2ban
Best Practices for VPS Security
- Regularly back up your data to recover from potential attacks.
- Use strong, unique passwords for all accounts.
- Limit user access and permissions to only what is necessary.
- Monitor server logs for unusual activity.
- Consider using a VPN for secure remote access.
Real-World Examples
In 2020, a major hosting provider suffered a data breach due to inadequate security measures on their VPS offerings. The breach exposed sensitive customer data and led to significant financial losses. This incident underscores the importance of implementing robust security practices from the outset.
Case Studies and Statistics
A study by the Ponemon Institute found that the average cost of a data breach is $3.86 million