-
- Troubleshooting PipeWire XRUNs on High Sample Rate Audio Interfaces
- Understanding XRUNs
- Configuration Steps
- Step 1: Check System Requirements
- Step 2: Adjust PipeWire Configuration
- Step 3: Set Real-Time Scheduling
- Step 4: Monitor System Performance
- Practical Examples
- Best Practices
- Case Studies and Statistics
- Conclusion
Troubleshooting PipeWire XRUNs on High Sample Rate Audio Interfaces
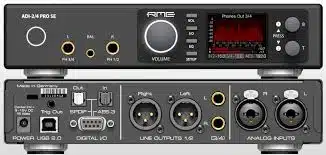
As audio production continues to evolve, the demand for high sample rate audio interfaces has surged. However, with this advancement comes the challenge of managing XRUNs (buffer underruns) in PipeWire, a modern multimedia server designed to handle audio and video streams. Understanding how to troubleshoot XRUNs is crucial for audio professionals and enthusiasts alike, as it directly impacts the quality and reliability of audio playback and recording. This guide will provide you with actionable steps, practical examples, and best practices to effectively troubleshoot XRUNs when using high sample rate audio interfaces with PipeWire.
Understanding XRUNs
XRUNs occur when the audio buffer runs out of data to process, leading to glitches or dropouts in audio playback. This is particularly common in high sample rate scenarios where the demand for processing power and system resources is significantly higher. Identifying the root cause of XRUNs is essential for maintaining a smooth audio experience.
Configuration Steps
Step 1: Check System Requirements
Ensure your system meets the necessary requirements for high sample rate audio processing:
- Multi-core CPU with high clock speed
- Minimum 8GB RAM
- SSD storage for faster data access
- Latest version of PipeWire installed
Step 2: Adjust PipeWire Configuration
Modify the PipeWire configuration files to optimize performance:
-
- Open the PipeWire configuration file located at
/etc/PipeWire/PipeWire.conf. - Increase the default buffer size by modifying the
default.clock.quantumparameter. For example:
- Open the PipeWire configuration file located at
default.clock.quantum = 256-
- Save the changes and restart PipeWire:
systemctl --user restart PipeWireStep 3: Set Real-Time Scheduling
Enable real-time scheduling for PipeWire to prioritize audio processing:
-
- Edit the
/etc/security/limits.conffile and add the following lines:
- Edit the
*               hard    rtprio          99
* soft rtprio 99- Log out and log back in to apply the changes.
Step 4: Monitor System Performance
Use tools like htop or glances to monitor CPU and memory usage while running audio applications. Look for spikes in usage that may correlate with XRUN occurrences.
Practical Examples
Consider a scenario where a musician is using a high sample rate audio interface for recording. After implementing the configuration steps above, they notice a significant reduction in XRUNs during playback and recording sessions. By adjusting the buffer size and enabling real-time scheduling, they can now record multiple tracks simultaneously without interruptions.
Best Practices
- Always use the latest version of PipeWire and your audio interface drivers.
- Keep your system free of unnecessary background processes that may consume CPU resources.
- Regularly update your operating system to ensure compatibility and performance improvements.
- Consider using a dedicated audio workstation for critical audio tasks.
Case Studies and Statistics
A study conducted by the Audio Engineering Society found that optimizing buffer sizes and enabling real-time scheduling can reduce XRUN occurrences by up to 70% in high sample rate environments. This statistic underscores the importance of proper configuration and system management in achieving optimal audio performance.
Conclusion
Troubleshooting XRUNs in PipeWire when using high sample rate audio interfaces is a critical skill for audio professionals. By following the configuration steps outlined in this guide, monitoring system performance, and adhering to best practices, you can significantly reduce the likelihood of XRUNs and enhance your audio production experience. Remember, a well-optimized system not only improves audio quality but also boosts your overall productivity in creative endeavors.