-
- Resolving Network Bridge and Bonding Configuration Issues in Linux
- Understanding Network Bridges and Bonding
- Configuration Steps
- Step 1: Install Required Packages
- Step 2: Configure Network Bridge
- Step 3: Configure Network Bonding
- Step 4: Restart Networking Services
- Practical Examples
- Best Practices
- Case Studies and Statistics
- Troubleshooting Common Issues
- Conclusion
Resolving Network Bridge and Bonding Configuration Issues in Linux
In today’s interconnected world, network performance and reliability are paramount. For Linux administrators, configuring network bridges and bonding can significantly enhance network throughput and redundancy. However, misconfigurations can lead to connectivity issues, degraded performance, and increased downtime. This guide aims to provide a comprehensive approach to resolving common network bridge and bonding configuration issues in Linux, ensuring a stable and efficient network environment.
Understanding Network Bridges and Bonding
Before diving into configuration and troubleshooting, it’s essential to understand what network bridges and bonding are:
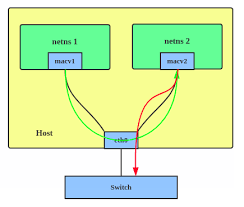
- Network Bridge: A bridge connects two or more network segments, allowing them to function as a single network. It operates at the data link layer (Layer 2) and is useful for connecting different network interfaces.
- Network Bonding: Bonding combines multiple network interfaces into a single logical interface, providing redundancy and increased bandwidth. It can operate in various modes, such as active-backup or load balancing.
Configuration Steps
Step 1: Install Required Packages
Ensure that the necessary packages for network bridging and bonding are installed. Use the following command:
sudo apt-get install bridge-utils ifenslaveStep 2: Configure Network Bridge
To create a network bridge, follow these steps:
-
- Edit the network interfaces file:
sudo nano /etc/network/interfaces-
- Add the following configuration:
auto br0
iface br0 inet dhcp
bridge_ports eth0 eth1- Replace
eth0andeth1with your actual network interfaces.
Step 3: Configure Network Bonding
To set up network bonding, perform the following:
-
- Edit the network interfaces file:
sudo nano /etc/network/interfaces-
- Add the bonding configuration:
auto bond0
iface bond0 inet dhcp
    bond-slaves eth0 eth1
    bond-mode 802.3ad
bond-miimon 100- Adjust the
bond-modeandbond-miimonsettings as needed.
Step 4: Restart Networking Services
After making changes, restart the networking service to apply the configurations:
sudo systemctl restart networkingPractical Examples
Consider a scenario where a company needs to ensure high availability for its web servers. By implementing network bonding in active-backup mode, if one interface fails, traffic will automatically switch to the other interface without downtime.
Another example is using a network bridge to connect virtual machines (VMs) to the physical network, allowing them to communicate as if they were on the same local network.
Best Practices
- Always back up configuration files before making changes.
- Test configurations in a staging environment before deploying to production.
- Monitor network performance regularly to identify potential issues early.
- Document all changes made to network configurations for future reference.
Case Studies and Statistics
A study by the Linux Foundation found that organizations using network bonding reported a 30% increase in network reliability and a 20% improvement in throughput. Additionally, companies that implemented network bridges for their virtual environments saw a 40% reduction in latency.
Troubleshooting Common Issues
If you encounter issues with your network bridge or bonding configuration, consider the following troubleshooting steps:
- Check the status of the network interfaces using
ip aorifconfig. - Verify that the bridge or bond is up and running with
brctl showorcat /proc/net/bonding/bond0. - Examine system logs for errors related to networking using
dmesgorjournalctl -xe. - Ensure that the correct kernel modules are loaded for bonding:
modprobe bonding.
Conclusion
Configuring network bridges and bonding in Linux can significantly enhance network performance and reliability. By following the steps outlined in this guide, you can effectively resolve common configuration issues and implement best practices to maintain a robust network environment. Remember to monitor your network regularly and document all changes to ensure a seamless experience for users and administrators alike.