-
- Migrating Legacy Applications to Modern VPS Infrastructure: A Step-by-Step Guide
- Understanding the Importance of Migration
- Step 1: Assess Your Current Environment
- Step 2: Choose the Right VPS Provider
- Step 3: Plan the Migration Strategy
- Step 4: Prepare the VPS Environment
- Step 5: Migrate Data and Applications
- Step 6: Testing and Validation
- Step 7: Go Live and Monitor
- Best Practices for Migration
- Case Studies and Statistics
- Conclusion
Migrating Legacy Applications to Modern VPS Infrastructure: A Step-by-Step Guide
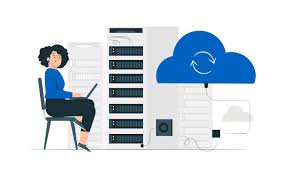
In today’s fast-paced digital landscape, businesses are increasingly reliant on technology to drive efficiency and innovation. However, many organizations still operate legacy applications that can hinder growth and scalability. Migrating these applications to a modern Virtual Private Server (VPS) infrastructure can significantly enhance performance, security, and manageability. This guide provides a comprehensive, step-by-step approach to successfully migrate legacy applications to a modern VPS environment.
Understanding the Importance of Migration
Legacy applications often run on outdated hardware and software, making them vulnerable to security risks and performance issues. Migrating to a VPS offers numerous benefits:
- Improved performance and speed
- Enhanced security features
- Scalability to accommodate growth
- Cost-effectiveness compared to traditional hosting
- Access to modern technologies and tools
Step 1: Assess Your Current Environment
Before initiating the migration process, it is crucial to assess your current application environment. This includes:
- Identifying all components of the legacy application
- Documenting dependencies and integrations
- Evaluating performance metrics and user feedback
For example, if you have a legacy CRM system, analyze its database size, user load, and any third-party integrations it relies on.
Step 2: Choose the Right VPS Provider
Selecting a reliable VPS provider is critical for a successful migration. Consider the following factors:
- Performance and uptime guarantees
- Scalability options
- Customer support and service level agreements (SLAs)
- Security features, including firewalls and DDoS protection
For instance, providers like DigitalOcean, Linode, and AWS offer robust VPS solutions tailored for various business needs.
Step 3: Plan the Migration Strategy
Develop a detailed migration plan that outlines the steps involved, timelines, and resource allocation. Key components of the plan should include:
- Data migration strategy
- Application deployment process
- Testing and validation procedures
- Rollback plan in case of issues
Utilizing tools like Trello or Asana can help manage tasks and timelines effectively.
Step 4: Prepare the VPS Environment
Once you have a migration plan, it’s time to set up the VPS environment. Follow these steps:
- Provision the VPS instance with the required specifications (CPU, RAM, storage).
- Install the necessary operating system and software dependencies.
- Configure security settings, including firewalls and SSH access.
For example, to install a LAMP stack on a Ubuntu VPS, you can use the following commands:
sudo apt update
sudo apt install apache2
sudo apt install mysql-server
sudo apt install php libapache2-mod-php php-mysql
Step 5: Migrate Data and Applications
With the VPS environment ready, you can begin migrating your data and applications. This process may involve:
- Exporting databases from the legacy system
- Transferring application files using SCP or FTP
- Importing databases into the new environment
For instance, to export a MySQL database, you can use:
mysqldump -u username -p database_name > backup.sql
Step 6: Testing and Validation
After migration, thorough testing is essential to ensure everything functions as expected. Key testing areas include:
- Functionality testing of the application
- Performance testing under load
- Security testing to identify vulnerabilities
Utilizing tools like JMeter for performance testing can provide valuable insights into application behavior under stress.
Step 7: Go Live and Monitor
Once testing is complete and you are satisfied with the results, it’s time to go live. Monitor the application closely during the initial phase to identify any issues. Key monitoring aspects include:
- Server performance metrics (CPU, memory usage)
- Application error logs
- User feedback and experience
Best Practices for Migration
To ensure a smooth migration process, consider the following best practices:
- Perform a pilot migration with a small subset of data first.
- Maintain backups of all data before starting the migration.
- Document every step of the process for future reference.
Case Studies and Statistics
According to a study by Gartner, organizations that migrated to cloud-based infrastructures reported a 30% reduction in operational costs and a 40% increase in application performance. Companies like Netflix and Airbnb have successfully migrated legacy systems to modern infrastructures, resulting in improved scalability and user experience.
Conclusion
Migrating legacy applications to a modern VPS infrastructure is a strategic move that can enhance performance, security, and scalability. By following this step-by-step guide, organizations can ensure a successful migration process. Remember to assess your current environment, choose the right VPS provider, plan meticulously, and monitor closely post-migration. Embracing modern infrastructure not only future-proofs your applications but also positions your organization for growth in an increasingly digital world.